

Pillar 8 of 8 · Ultrasound Inspection Methodology
Ultrasonic Tightness Testing in Kazakhstan
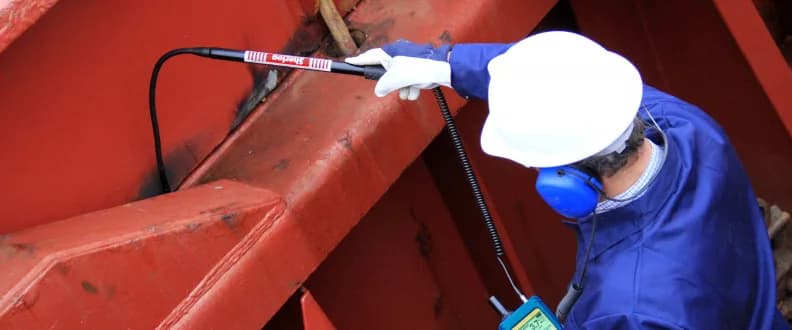
Ultrasonic tightness testing — the eighth and final pillar of the ultrasound inspection methodology — checks the tightness of seals, vessels, and pipework in 2 minutes with no water, soap solution, or change to the working medium. The method works on a simple principle: an ultrasonic source (transmitter) generates a 40 kHz signal on one side of the joint, while a detector outside instantly responds to any breach in tightness.
The dedicated TightChecker kit from SDT includes an ultrasonic transmitter and a detector. It is used on flanges, hatches, doors, cabins, gearbox housings, vessels and heat exchangers. The leak point shows up as a signal peak as the sensor moves along the seam, with no need to inspect the whole joint visually.
KEG TRK is the official SDT Ultrasound Solutions distributor in Kazakhstan. We supply TightChecker and complete tightness testing solutions to oil, gas, chemical, and food industry plants across the country. Training on the ultrasonic tightness testing methodology is included with every delivery.
Applications of Ultrasonic Tightness Testing
A single TightChecker kit covers tightness control across an entire plant.
Seal and gasket inspection
Checking the tightness of flange joints, hatches, and pump mechanical seals. An ultrasonic source on one side and a detector on the other give an unambiguous result with no disassembly.
Industrial vessel testing
Checking the tightness of tanks, reactors, and heat exchangers after installation or repair. The ultrasonic method is an alternative to water or gas pressure testing for media-restricted assets.
Inspection without disassembly
Checking gearbox housings, crankcases, and protective covers right on the equipment — no need to remove or strip down assemblies to verify their tightness.
Quality control in production
Outgoing inspection of assemblies: valve seals, gearbox housings, pipework joints. A fast check of every unit on the production line without slowing the pace.
How to Perform Ultrasonic Tightness Testing
Three steps from the signal source to the inspection report.
Place the ultrasonic source
Place the ultrasonic transmitter inside the vessel, housing, or behind the flange joint. The source emits a signal at 40 kHz, which passes through any breach in tightness.
Scan with the detector outside
Slowly move the detector along the seam, gasket, or seal from the outside. A tightness breach shows up instantly as a sharp rise in the signal — both audible and numerical.
Log the location and build a report
Mark the leak point on the object and note the reading. After the repair, measure again: the signal at that point should drop to background. The results go into the inspection report.
Benefits of Ultrasonic Tightness Testing
Speed, accuracy, and versatility for plants in Kazakhstan.
No water, soap, or tracer gas
Traditional methods (soap solution, helium pressure testing) require special preparation and are unavailable for many media. The ultrasonic method works everywhere — just a sensor and an ultrasonic source.
Testing in 2 minutes
Transmitter inside, detector outside: a flange or hatch is checked in a few minutes, without filling with water or applying soap solution that has to be cleaned off afterwards.
Precise leak location
The detector responds immediately to the breach point — no need to inspect the entire joint. The source of the problem is pinpointed to a specific section of the seam or gasket.
Testing in hard-to-reach places
The ultrasonic sensor is compact with a flexible probe. Flanges in tight spaces, inside structures, or in confined conditions can be checked without special scaffolding.
No tracer gas
No helium or other tracer gas is needed. The transmitter radiates airborne ultrasound, so the object is tested empty or with an air space at the seam being checked. Where a transmitter cannot be placed, a small overpressure or vacuum is applied and the joints are checked from outside.
Results documentation
Readings are logged for each point, and a repeat measurement after the repair confirms the fix. SDT270 and SDT340 store the measurements and upload them to Ultranalysis Suite 3.
Need to test the tightness of your equipment?
KEG TRK specialists will help you choose the right kit for your asset types and testing conditions.
Request a consultationSDT Instruments for Tightness Testing
From the dedicated TightChecker to the professional SDT340.
TightChecker
DedicatedA dedicated tightness testing kit: detector + ultrasonic transmitter. Simple and reliable.
Recommended for: Tightness testing, no UT experience
SDT340
ProfessionalA multi-sensor platform with ultrasound and an air sensor. Comprehensive tightness testing.
Recommended for: Critical assets, documentation
SDT270
Data & trendsAn advanced detector with data logging for a tightness control program.
Recommended for: Incoming / outgoing inspection programs
SDT200
For beginnersAn entry-level detector with a transmitter to kick off a tightness control program.
Recommended for: First step, simple assets
Explore the Other Pillars of Ultrasonic Testing
The methodology covers 8 areas — one instrument handles every task.
Frequently Asked Questions About Ultrasonic Tightness Testing
Need advice?
Our specialists will help you choose the optimal the TightChecker kit for tightness testing configuration for your equipment.