
Calibrating and Maintaining a Tiger PID Detector: Bump Test, Lamp Cleaning, Electrode Replacement
A maintenance routine for photoionisation detectors: how calibration differs from a bump test, how often to do each, how to clean the UV lamp and replace the electrode stack, and which records to keep for audits and verification.
In this article
Prepared by the KEG TRK team · How we prepare our content
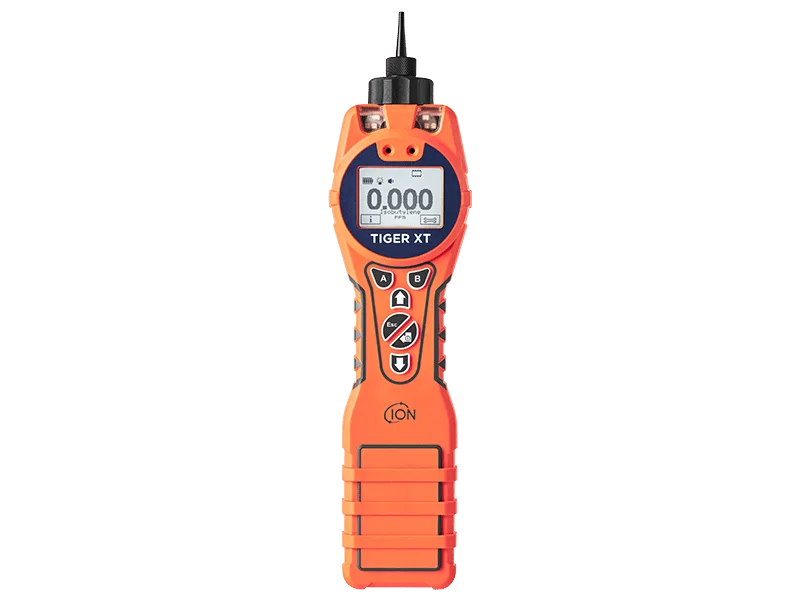
A PID detector is an instrument whose readings decide whether a person may work in a zone. So the question "is it reading correctly?" must have a documented answer every day. Photoionisation sensors are sensitive to lamp and electrode contamination, and an instrument with a dirty lamp may show a calm zero where the concentration is already hazardous.
Below is a practical maintenance routine for Tiger and other Ion Science PIDs: what to do before every shift, monthly and annually.
Three different procedures that are often confused
| Procedure | What it checks | How | When |
|---|---|---|---|
| Bump test | The instrument responds to gas and alarms | Brief exposure to a known concentration, no adjustment | Before every use |
| Calibration | Readings match actual concentration | Zero with clean air and span with reference gas | After a failed bump test, per schedule, after maintenance |
| Verification | Metrological conformity to the approved instrument type | At an accredited laboratory | At the interval stated on the certificate |
A bump test does not replace calibration, and calibration does not replace verification. They are three levels of control with different frequency and purpose.
Bump test: before every shift
Purpose: confirm the sensor is alive, the lamp is on, the pump draws a sample and the alarm works.
Steps:
- Switch the instrument on in clean air and wait until it is ready.
- Apply calibration gas (usually 100 ppm isobutylene) through the adaptor.
- Confirm the reading rises within tolerance (for example ±20% of nominal; check your corporate procedure) and the alarm triggers.
- Record the result.
If it fails: the instrument is not used until calibrated. If calibration also fails: clean the lamp, replace the filter, then calibrate again.
The typical cause of a failed bump test is not the sensor but a blocked inlet filter or a kinked sample hose: gas simply does not reach the sensor.
Equipment covered in this article
Ion Science Tiger XT — handheld PID detector for volatile organic compounds
Intrinsically safe Ion Science photoionisation detector for over 750 volatile organic compounds: 1 ppb to 20,000 ppm, T90 under 2 s, Fence Electrode technology against…
Calibration: zero and span
Zero. Apply clean air, either from a zero air cylinder or through a carbon filter. Zeroing in "clean workshop air" without a filter is a common mistake: if the workshop background is 0.5 ppm, that background becomes the new zero and all subsequent readings will be low.
Span. Apply reference gas: isobutylene of known concentration from a certified cylinder. Use the flow rate specified in the instrument manual, through a regulator and adaptor.
When to calibrate:
- after a failed bump test;
- after lamp cleaning or replacement of the electrode stack or filter;
- after exposure to high concentrations (the sensor may be saturated or contaminated);
- per site schedule, more often under heavy use;
- when changing the lamp.
Tip: calibration gas has an expiry date; check it on the cylinder certificate. An expired cylinder gives a false calibration.
Lamp cleaning and electrode replacement
Why the lamp gets dirty
The PID UV lamp has a window through which radiation passes. Over time a film forms on it: photolysis products of organic substances, dust, condensate. The film absorbs UV and sensitivity drops. This happens especially fast when working at high concentrations and in dusty, humid environments.
Signs of a dirty lamp:
- calibration passes but sensitivity drops quickly afterwards;
- the instrument needs calibration more and more often;
- unstable readings on zero air.
How to clean it
Clean the lamp window with the polishing compound from the manufacturer's lamp cleaning kit using a gentle circular motion, then remove residue. Do not touch the window with your fingers or use solvents or abrasives not supplied in the kit. Calibrate after cleaning and reassembly.
Electrode stack
Sensor electrodes also get dirty and wear over time. Fence Electrode technology in Ion Science instruments reduces the effect of humidity and contamination but does not eliminate it. If lamp cleaning does not restore stability, replace the electrode stack. It is a consumable with a finite life.
Filters
The inlet filter protects the sensor from dust and droplets. Replace it per schedule and immediately when visibly dirty. Running without a filter "for faster response" is a direct route to a contaminated sensor.
Maintenance schedule: summary table
| Task | Frequency | Who |
|---|---|---|
| Visual check, battery check | Before every use | User |
| Bump test | Before every use | User |
| Zero and span calibration | Per site schedule and after maintenance | Trained user / instrumentation team |
| Inlet filter replacement | When dirty, at least per schedule | Trained user |
| Lamp cleaning | When signs of contamination appear, after high-concentration work | Instrumentation team |
| Electrode stack replacement | When worn | Instrumentation team / service |
| Verification | At the verification interval | Accredited laboratory |
Records for audits
If an incident occurs on site, the first question from the investigation is "was the instrument working?" The answer must be documented:
- a bump test log with date, instrument number, result and name;
- a calibration log with cylinder number and expiry date;
- a maintenance log: lamp cleaning, filter and electrode replacements;
- a valid verification certificate.
Tiger instruments store measurement history, and Ion Science software allows data to be downloaded. Use this, not just a paper log.
Verification in Kazakhstan
Gas detectors used for safety monitoring fall within the scope of state regulation of measurement uniformity and are subject to verification. An imported instrument needs an approved measuring instrument type in the Kazakhstan register. When purchasing, ask the supplier about the type approval certificate and the initial verification procedure. More on organising verification in the article on verification and calibration of measuring instruments.
In frost and in heat
- Frost. Batteries lose capacity; keep the instrument warm and bring it out into the cold just before work. When moving from cold to warm, let the instrument warm up while still closed, otherwise condensation forms inside.
- Heat and dust. Replace the filter more often and do not leave the instrument in direct sunlight in a vehicle.
- High humidity. Fence Electrode reduces the effect of humidity, but a bump test is especially important in these conditions.
Summary
A reliable PID detector is not only a good instrument but also discipline: a bump test before every shift, calibration per schedule, a clean lamp, a fresh filter, valid verification and records you can produce. Without this, even the best instrument can show a safe zero where it is not safe to work.
KEG TRK supplies Ion Science instruments, calibration gases and consumables, and advises on organising maintenance and verification. Instrument selection is covered in the article on choosing a PID detector.
Equipment in this article
KEG TRK quotes prices and delivery times to Kazakhstan on request. We will prepare a commercial offer for your application.
Ion Science Tiger XT — handheld PID detector for volatile organic compounds
Intrinsically safe Ion Science photoionisation detector for over 750 volatile organic compounds: 1 ppb to 20,000 ppm, T90 under 2 s, Fence Electrode technology against…

Ion Science Tiger XTL — handheld PID VOC detector for routine rounds
Simplified version of the Tiger photoionisation detector: 0.1–5,000 ppm range, T90 under 2 s, 80,000 data points in 128 zones, ATEX and IECEx certified, IP65, up to 24 h…
Also in this article: Ion Science Tiger XT Select — handheld benzene detector, Ion Science Cub — personal VOC monitor
Read also
9/25/2026
Tiger, Tiger Select, Titan 2, Falco or Cub: How to Choose an Ion Science PID Detector for the Job
A comparison of the Ion Science range: portable Tiger XT and Tiger XTL, selective Tiger Select, fixed Falco and Titan 2, personal Cub. A selection table and typical kits for a refinery, a chemical plant and a solvent store.
9/27/2026
PID Response Factors: How Tiger Measures a Specific Compound When Calibrated with Isobutylene
What a photoionisation detector response factor is, why PIDs are calibrated with isobutylene, how to convert readings to toluene, acetone or hexane, how to handle mixtures and where errors begin.
11/3/2026
Which Ion Science instrument to choose: VOC, benzene, mercury, SF6, helium
Choosing an Ion Science gas instrument by task: PID detectors for VOC and benzene, mercury vapor indicator, SF6 leak detectors, helium and hydrogen detector. Tables of instruments, lamps and ranges.